Integrated Tools
Active Comments Editor
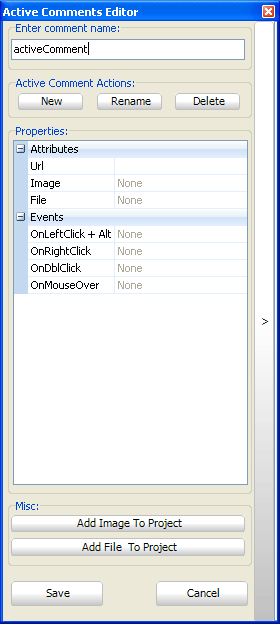
Active Comments Editor is a tool, particularly useful when working with Lcd display. You can launch it from the drop-down menu Tools › Active Comments Editor or by clicking the Active Comment Editor Icon ![]() from Tools toolbar.
from Tools toolbar.

ASCII Chart
The ASCII Chart is a handy tool, particularly useful when working with Lcd display. You can launch it from the drop-down menu Tools › ASCII chart or by clicking the View ASCII Chart Icon ![]() from Tools toolbar.
from Tools toolbar.

EEPROM Editor
The EEPROM Editor is used for manipulating MCU's EEPROM memory. You can launch it from the drop-down menu Tools › EEPROM Editor.
When you run mikroElektronika programmer software from mikroC PRO for AVR IDE - project_name.hex file will be loaded automatically
while ihex file must be loaded manually.

GLCD Bitmap Editor
The mikroC PRO for AVR includes the Graphic Lcd Bitmap Editor. Output is the mikroC PRO for AVR compatible code. You can launch it from the drop-down menu Tools › Glcd Bitmap Editor.

Lcd Custom Character Editor
mikroC PRO for AVR includes the Lcd Custom Character Editor. Output is mikroC PRO for AVR compatible code. You can launch it from the drop-down menu Tools › Lcd Custom Character.

mikroBootloader
What is a Bootloader
The microcontrollers have the ability to write to their own program memory. This feature allows a small bootloader program to receive and write new firmware into memory. In its most simple form, the bootloader starts the user code running, unless it finds that new firmware should be downloaded. If there is new firmware to be downloaded, it gets the data and writes it into program memory. There are many variations and additional features that can be added to improve reliability and simplify the use of the bootloader.
 Note :
mikroBootloader can be used only with MCUs that support flash write.
How to use mikroBootloader
- Load the MCU with the appropriate hex file using the conventional programming techniques.
- Start mikroBootloader from the drop-down menu Tools › Bootoader.
- Click on Change Settings and select the COM port and the BAUD that will be used.
- Click on Connect and wait until connected. Since the bootcode in the MCU only gives the computer 4-5 sec to connect, you should reset the MCU and then click on the Connect button within 4-5 seconds.
- Click on Browse for HEX and select the HEX file you would like to upload.
- The last line in then history window should now read “Connected”.
- To start the upload, just click on the Begin uploading button.
- Your program will written to the MCU. Bootloader will report an errors that may occur.
- Reset your MCU and start to execute.

Features
The boot code gives the computer 5 seconds to get connected to it. If not, it starts running the existing user code. If there is a new user code to be downloaded, the boot code receives and writes the data into program memory.
The more common features a bootloader may have are listed below:
- Code at the Reset location.
- Code elsewhere in a small area of memory.
- Checks to see if the user wants new user code to be loaded.
- Starts execution of the user code if no new user code is to be loaded.
- Receives new user code via a communication channel if code is to be loaded.
- Programs the new user code into memory.
Integrating User Code and Boot Code
The boot code almost always uses the Reset location and some additional program memory. It is a simple piece of code that does not need to use interrupts; therefore, the user code can use the normal interrupt vector at 0x0004. The boot code must avoid using the interrupt vector, so it should have a program branch in the address range 0x0000 to 0x0003. The boot code must be programmed into memory using conventional programming techniques, and the configuration bits must be programmed at this time. The boot code is unable to access the configuration bits, since they are not mapped into the program memory space.
Seven Segment Editor
The Seven Segment Editor is a convenient visual panel which returns decimal/hex value for any viable combination you would like to display on seven segment display. Click on the parts of seven segment image to get the requested value in the edit boxes. You can launch it from the drop-down menu Tools › Seven Segment Editor or by clicking the Seven Segment Editor Icon ![]() from Tools toolbar.
from Tools toolbar.

UDP Terminal
The mikroC PRO for AVR includes the UDP Terminal. You can launch it from the drop-down menu Tools › UDP Terminal.

USART Terminal
The mikroC PRO for AVR includes the USART communication terminal for RS232 communication. You can launch it from the drop-down menu Tools › USART Terminal or by clicking the USART Terminal Icon ![]() from Tools toolbar.
from Tools toolbar.

What do you think about this topic ? Send us feedback!


